Here are the ingredients:
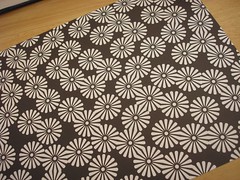
This is scrapbook paper I purchased at Target. It's pretty thick and hard to wrangle. I would suggest that you try some thinner paper first, like magazine pages or newspaper.
I prefer to use already used paper, but I'll mix it up when I feel like it; I've used paper from paperback books, origami paper, magazines and newspaper. I like using paperback books best, but the stark black-and-white print on this scrapbook paper appeals to me, though most of the pattern is going to be lost when the beads are rolled up.
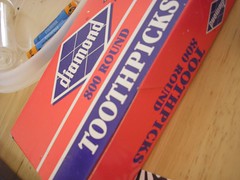
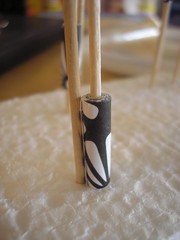
Toothpicks. You don't have to use round ones, you can use square ones. Or you can use none at all. (You can just make a tiny 1/16 inch fold at the end and start rolling the paper from there.) Or you can use a chopstick or the handle of a small paint brush. I like using toothpicks because you can stick the rolled bead into a block of styrofoam to dry. (If you don't use toothpicks at all, I would suggest laying the beads down on some wax paper while the glue dries. The wax paper won't stick to your glue. Mostly.)

You will need glue. I like this Scotch Wrinkle-free Glue Stick because it really is wrinkle free. I suppose it's wrinkle free because it has a low moisture content which, as you will see in a moment, is not always a good thing. But it's what I have around. (I've also used Aleene's Tacky Glue, and I like that, too.)
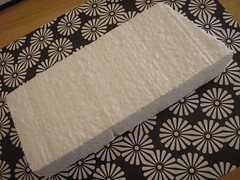
A Styrofoam block. This is a bit from some old packing material. I tried using florists' foam, but it disintegrated as I used it and left little bits of itself in the varnish. That made me sad.
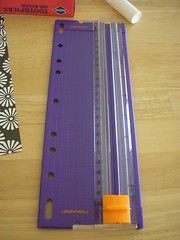
A papercutter. This is also not strictly necessary. I also like to cut the paper freehand with scissors. It depends on how precise you feel like being.
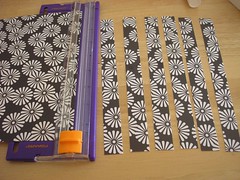
This does cut some nice 3/4 inch strips of paper.
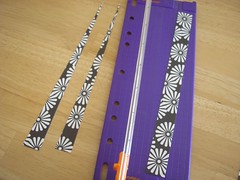
Those strips can be cut from one corner to the opposite corner to make long triangles.

I don't cut too much paper at once. I have a short attention span, so this is about my limit for bead rolling for one kind of paper. I expected to make eight beads from this, but I actually got ten.
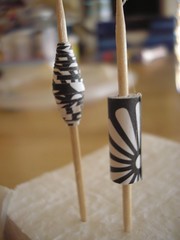
The long triangles, by the way, make the bead shape on the left. The rectangular strips make the bead shape on the right. I like them both.
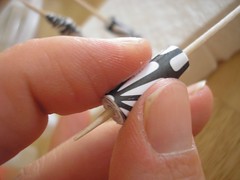
After you cut your paper, roll a bit around the toothpick and then lay down some glue on the end of the strip. I probably cover about 3/4 of the strip with glue, roll, roll, roll, then add more glue to the last 1/10th of the strip, the very end, just in case. Then I hold the end in place for a bit.
If I don't feel like holding it in place, I put one toothpick next to it, to keep the end from unwinding. (This doesn't happen as often with the long triangle beads as it does with the rectangular beads.) Glue with a higher moisture content seems to lessen the chance of the bead unraveling while it dries. I imagine it's because the water in the glue "remakes" the paper a bit, so it curls better at the end.

Simple, no?
I made a forest of beads. Well, I made ten beads anyway.
Oh! Right. The eight to ten thing: So, scrapbook paper is pretty thick, and when I wound up the rectangular beads, they too were pretty thick (in diameter). Because I don't want them to be terribly thick, I cut the long strips into shorter strips (halved them, to be exact) and made the beads from the shorter strips. Only, since I had already rolled up one thick bead and it needed a partner (I use the beads to make earrings), I rolled two thick beads and four thin ones (and four triangle ones).
A note about varnishing the beads:
You can varnish them if you want them to last longer. I use Duncan indoor/outdoor waterbased varnish (or just the indoor stuff, which has a slightly more matte finish). I don't use Mod Podge, but I suppose you could. Some people just use glue, but I think it leaves them a bit tacky (not as in bad taste, but as in sticky) and then the beads stick together when I store them.
I put on 2 - 6 coats of varnish, paying attention to the edges. I wait until the last coat doesn't feel tacky anymore (20 - 60 minutes, or whenever I think of it.) I usually let the varnish dry for a couple of hours at the end.
So that's it!
Update:
Check this out:

That's a "Craft Star" that I got from the folks at Craftsource (if you click the picture, it'll take you to their site). I think I also got three wishes with it, but I'm not exactly sure how that works.
8 comments:
wow awesome!!! and is so simple ^.^ !!!
yes!
I like to use clear nail polish for a varnish. It's simple and dries fairly quickly.
Hi, Megthom!
I've heard about using nail polish and I think if you have it around, it's a great idea. (I'm not a very girly girl, so I never have any clear nail varnish around...) I've heard it can go yellow over time--but I guess if I wanted permanence, I wouldn't be making jewelry out of paper, no? :)
I use super dry from $ tree it super shiny dries quickly and doesnt yellow for a dollar is even better.
Does the glue stick to the toothpick?
Post a Comment